

![YHDC Non-Invasive AC Current Transformer Sensor [Current] - Image 1](https://www.electrodragon.com/wp-content/uploads/2013/11/YHDC-Non-Invasive-AC-Current-Transformer-Sensor-Current-400x400.png)
![YHDC Non-Invasive AC Current Transformer Sensor [Current] - Image 2](https://www.electrodragon.com/wp-content/uploads/2013/11/YHDC-CT-Sensor-560x560.jpg)
![YHDC Non-Invasive AC Current Transformer Sensor [Current] - Image 3](https://www.electrodragon.com/wp-content/uploads/2013/11/YHDC-CT-Sensor-03-400x400.jpg)
![YHDC Non-Invasive AC Current Transformer Sensor [Current] - Image 4](https://www.electrodragon.com/wp-content/uploads/2013/11/YHDC-CT-Sensor-02-400x400.jpg)
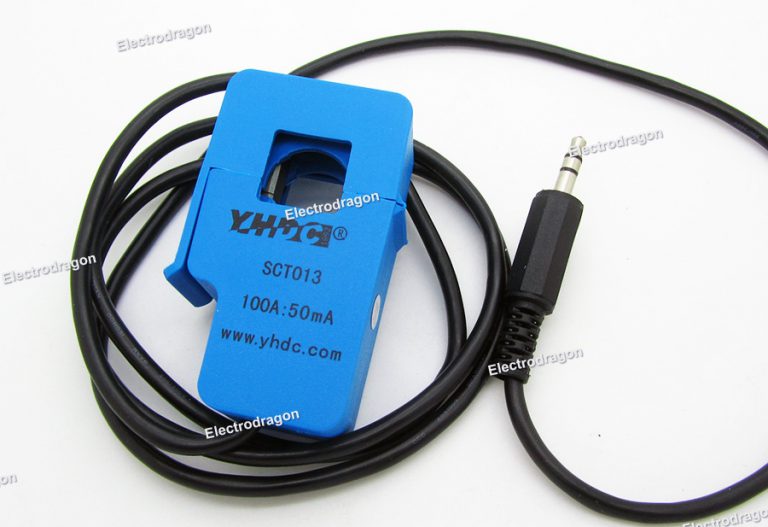
YHDC Non-Invasive AC Current Transformer Sensor [Current]
$6.30
- Description
- Additional information
- Reviews (2)
- Enquiry2
Description
This is non-invasive CT (Current Transformer) sensor, based on the magnetive transomfer working principle, which is hard to be explained by us but you can read a lot on this current transformer wiki page, or similar device “current clamp”. If you are interesting on power energy measurement, power grid, or measuring any alive domestic appliance or your system, this is one thing fun to try.
Applications
- Suitable for the current measuring
- Monitoring and protection of AC motor
- Lighting equipment
- Air compressor
Specifications
- Non-linearity: ±3%
- Turn Ratio: 100A:0.05A
- Resistance Grade: Grade B
- Work Temperature: -25°C ~ ﹢70°C
- Dielectric Strength(between shell and output): 1000V AC/1min 5mA
- Leading Wire in Length: 1m
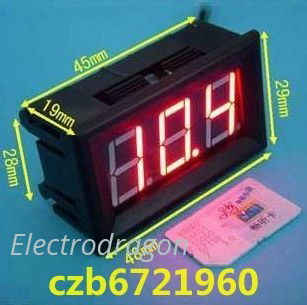
- Open Size: 13mm x 13mm
Versions:
- For 100A AC Version:
- 0~100A AC
- Output Mode: 0~50mA
- For 30A AC Version:
- 0~30A AC
- Output Mode: 0~1V
Buck order price is 17% off for over 50pcs order, auto update in cart.

![VAC Energy Meter Power Sensor Board, HLW8032 Isolated V2 [Amp]](https://www.electrodragon.com/wp-content/uploads/2025/06/VAC-Energy-Meter-Power-Sensor-Board-HLW8032-Isolated-V2-02-400x400.jpg)


![Digits Display Header, DC Current Meter Ammeter [Current]](https://www.electrodragon.com/wp-content/uploads/2012/10/DC-Digital-Current-Meter-Ammeter-10A-4.jpg)

![Energy Meter HLW8032 Breakout Board V3 [VER]](https://www.electrodragon.com/wp-content/uploads/2020/12/Energy-Meter-HLW8032-Breakout-Board-basic-version-02-400x400.jpg)

![ACS712 Current Sensor [Current]](https://www.electrodragon.com/wp-content/uploads/2013/10/ACS712-Current-Sensor-560x560.jpg)

Amal –
大大我現在換用另一台電視 紅外線遙控+button做電視開關現在程式一樣可以選台~電視開關有時可以有時不可以怪怪的用moniter爭測也沒有HIGH呢幫我看看成是哪裡出問題了 謝謝~/* * Keypad_TVRemote.pde: 自製紅外線電視遙控器(使用 Keypad) */#include // 引用 Keypad 函式庫#include // 引用 IRRemote 函式庫const int bottunPin = 4; // 按鍵(pushbutton)接在 pin 4int bottunState = 0; // 按鍵狀態const byte ROWS = 4; // 3×4 Keypadconst byte COLS = 3;char keys[ROWS][COLS] = { // 定義 Keypad 的按鍵 {‘1′,’2′,’3’}, {‘4′,’5′,’6’}, {‘7′,’8′,’9’}, {‘*’,’0′,’#’}};// 定義 Keypad 連到 Arduino 的接腳// Keypad 腳位佈局:// Rows: 2, 7, 6, 4// Cols: 3, 1, 5byte rowPins[ROWS] = {11, 6, 7, 9}; // 連到 Keypad 的 4 個 Rows: Row0, Row1, Row2, Row3byte colPins[COLS] = {10, 12, 8}; // 連到 Keypad 的 3 個 Columns: Column0, Column1, Column2/*// Keypad 腳位佈局:// Rows: 4, 5, 6, 7// Cols: 1, 2, 3byte rowPins[ROWS] = {9, 8, 7, 6}; // 連到 Keypad 的 4 個 Rows: Row0, Row1, Row2, Row3byte colPins[COLS] = {12, 11, 10}; // 連到 Keypad 的 3 個 Columns: Column0, Column1, Column2*/// 建立 Keypad 物件Keypad keypad = Keypad( makeKeymap(keys), rowPins, colPins, ROWS, COLS );// 紅外線編碼對應表// 這是我電視遙控器的紅外線編碼 記得換成你的紅外線編碼long irKeyCodes[12] = { 0x6F920DF, 0x6F9A05F, 0x6F9FA05, // 對應 Keypad 的 ‘1’, ‘2’, ‘3’ 0x6F9E01F, 0x6F910EF, 0x6F9906F, // 對應 Keypad 的 ‘4’, ‘5’, ‘6’ 0x6F950AF, 0x6F9D02F, 0x6F930CF, // 對應 Keypad 的 ‘7’, ‘8’, ‘9’ 0x6F9A857, 0x6F9C03F, 0x6F99867 , // 對應 Keypad 的 ‘*’, ‘*’, ‘#’};IRsend irsend; // 定義 IRsend 物件來發射紅外線訊號void setup(){ pinMode(buttonPin, INPUT); // 把 bottunPin 設置成 INPUT{ Serial.begin(9600); // 開啟 Serial port, 通訊速率為 9600 bps}}void loop() { // 讀取按鍵狀態 bottunState = digitalRead(buttonPin); // 檢查按鍵是否被按下(pressed) // 有的話 bottunState 會是 HIGH if (buttonState == HIGH){ // 發射紅外線訊號 irsend.sendNEC(0x6F900FF, 32); // 我電視 Power 鈕的紅外線編碼, 記得換成你的紅外線編碼 } { char key = keypad.getKey(); byte irKeyIndex; // 檢查 Keypad 是否有被按下 // 有的話 key 會是非 NO_KEY 的值 if (key != NO_KEY){ Serial.println(key); // 把按鍵印到 Serial Port // 計算 irKeyCodes 的索引 switch (key) { case ‘*’: irKeyIndex = 9; // 降低音量 (volume-) break; case ‘0’: irKeyIndex = 10; // 按鍵 ‘0’ break; case ‘#’: // 提高音量 (volume+) irKeyIndex = 11; break; default: irKeyIndex = key – ‘1’; // 按鍵 1 ~ 9 } irsend.sendNEC(irKeyCodes[irKeyIndex], 32); // 發射紅外線訊號 } }}
thiagoas (verified owner) –
Works great! Good build quality.